Sunday, 21 April 2013

Custard Horns

It's been far too long since the last time I have posted something. I've been so busy with university, work, work and more work. Ugh! Yesterday I decided to make custard horns to bring over for my Aunty's birthday - hoorays from everybody :P. She's just come over from Hawaii and isn't staying long, so my big big family has decided to host a party for her. Along with custard horns, I also prepared a birthday jelly cake for her (more on this later). Such a busy day yesterday, as I was frantically trying to bake the puff pastry horns and get some study done in between (you'll see how I had the chance later on :D). 


These custard horns are horns made of flaky puff pastry, filled with creamy creamy custard and dusted off with icing sugar. They are well received by all and their small "bite size" shape will have people on low-sugar/low-fat diets drooling for more haha. With the simplicity of this recipe - anyone will be able to accomplish such a delectable dessert :).

Now, let's get started.

Utensils
- 6 x metal baking horns (if you're baking more, make sure you have more horns otherwise you'll be baking for hours!). You can purchase these online as I have done. I currently only have 6, but have ordered 12 more so I don't spend too much time baking large batches.
- 2 x pastry brushes 
- piping bag/piping syringe
- sieve for sifting icing sugar

Ingredients
- 1 batch of thick custard (I used about 250 mL for about 48 horns. If you're making the custard yourself, make sure to use less sugar - as you will be dusting the horns with icing sugar later on.)
- 3 sheets of puff pastry, thawed
- 1 egg, beaten
- butter for coating the baking horns
- about 3 tablespoons icing sugar

Method
1. Cut each sheet of puff pastry into 16 strips.

2. Brush and coat the metal horns with butter (make sure you don't miss a spot! Otherwise the puff pastry will stick to the horns).


 3. Take a strip of puff pastry and wrap it around the horn, starting from the apex. As you can see from the photo below, they don't have to look perfect!! Just make sure you don't leave any "gaps" in wrapping the pastry around the horn.


 4. It's egg wash time! Although this isn't absolutely necessary, it gives the puff pastry a little extra flavour and crisp. Coat all the puff pastry wrapped horns evenly. :)


5. Bake in your oven for about 15 minutes at 220 degrees fan-forced, or until the horns are puffed and golden. The batch below took me quite a long time because I've been working with 6 horns at a time.


6. Fill the horns with custard until your heart's content!... I mean, until the custard horns are full. 


Normally I would be holding the piping syringe in with my left hand and the baked horn with my right, but I had to take these photos myself - so make sure you don't copy exactly what I am doing in the photo below!


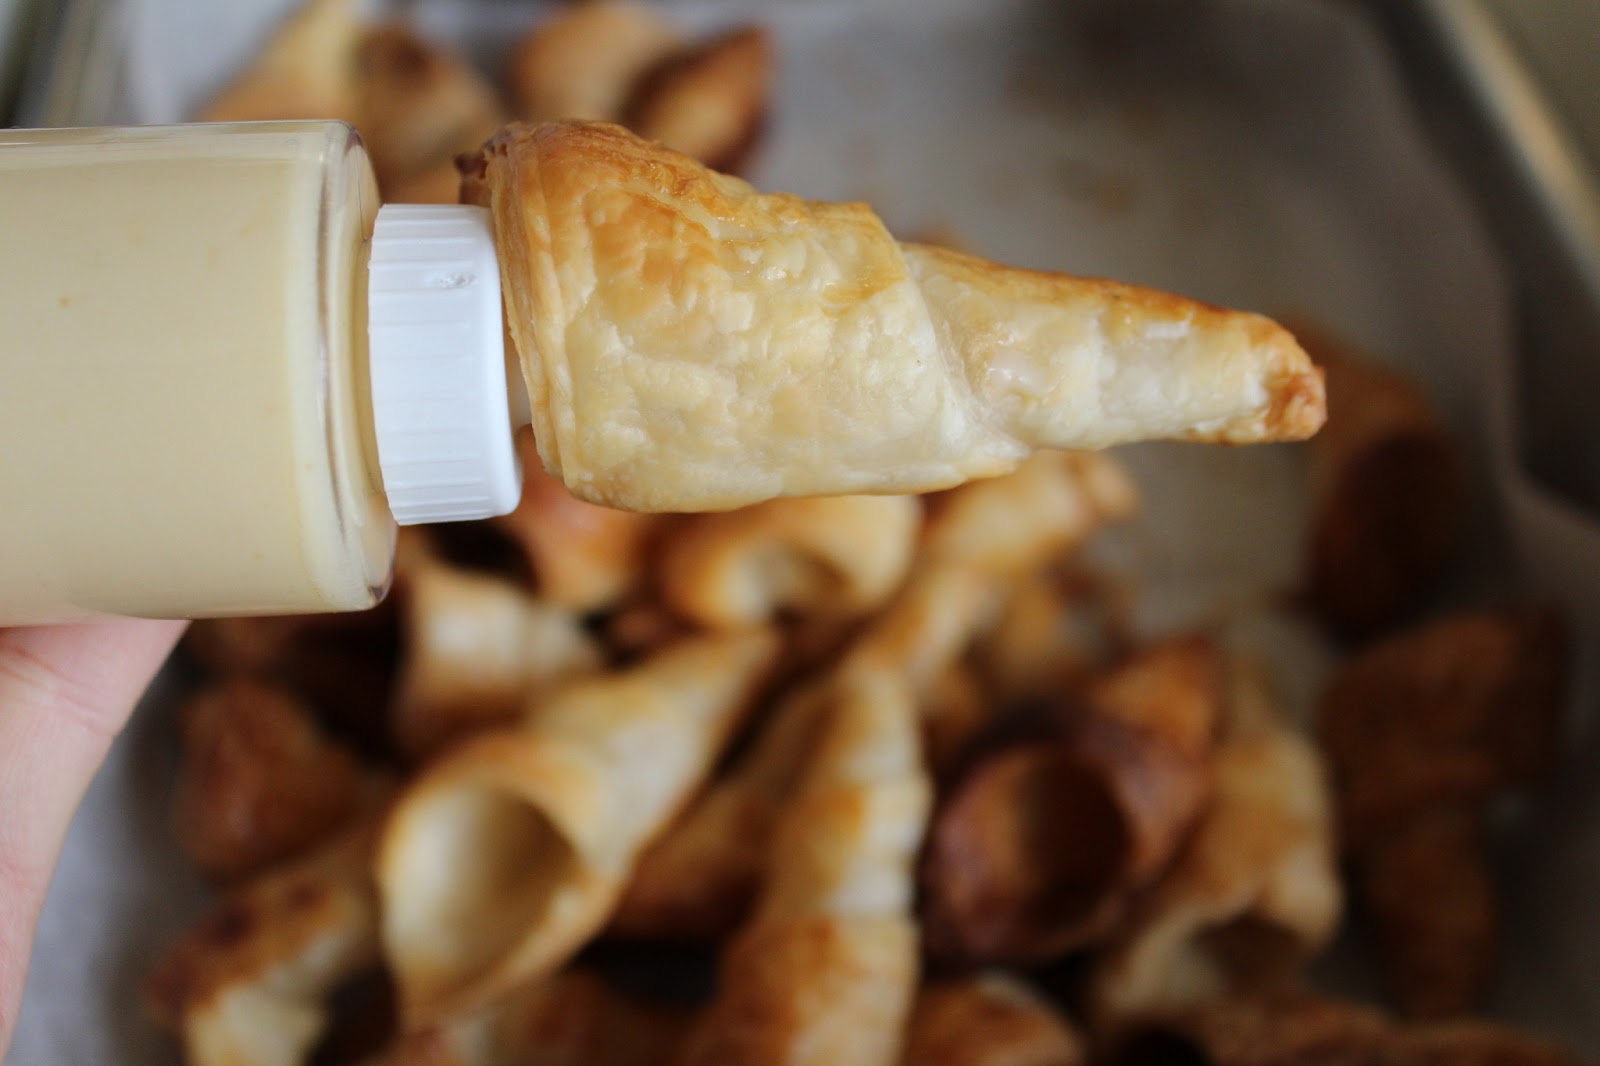
Here is my first custard filled horn. 


And proceed to fill every other horn with custard... mmmmm


7. After all your horns have been filled, you are ready to put on the finishing touches to your horns. I have used "icing mixture" instead if icing sugar - I believe it's not as sweet as icing sugar (though I haven't confirmed this yet).


Ta-da! Now you have an awesome crowd please - all my cousins chomped these down like there was no tomorrow, so I didn't end up having any. Make sure to keep 2 or 3 for yourself :P


Many people wonder why I am still "in shape" since I bake so much. Well, although I love baking, what I love more is seeing the looks on people's faces once they have tried my dessert, or seeing how happy/satisfied they are. I give away the desserts I make and rarely eat it for myself, so I guess that's why!


Love,
Bakerella

Sunday, 13 January 2013

Creamy mushroom and bacon pasta

My boyfriend once took me to a Japanese restaurant and one of his favourite dishes was a creamy mushroom pasta. It's pretty good. They have about 5 different types of mushroom in it, and it IS creamy. So I went home and wanted to replicate it some how, but where to start? I have never made this before and would have never thought about it if my boyfriend hadn't introduced me to the creamy pasta that day. The first time I made it for him, his family had complimented me on the pasta. The recipe is simple and creamy. First one I picked, and have been using for almost 1 1/2 years now!

The recipe I used:
Creamy mushroom and bacon pasta

The recipe calls for tortellini, but any preferred pasta is good enough. In Step 3. after frying the bacon until golden, sprinkle the bacon with flour. This is a very important step to have initially removed the rind of the bacon - otherwise you get a pan of bacon soaked in oil. It's not a pretty sight, nor a healthy situation. If you hadn't removed the rind, scoop that oil out! It's going straight to the arteries otherwise.

In Step 4. they want you to add the sauce to the pasta. However it should be - "add pasta to the sauce" and cook for another few minutes. If you are not ready to serve, you don't need to cook the mixed sauce and pasta for another few minutes. Leave the mixture in the pot, until everyone is at the dinner table, heat the mixture up, stir through - add some vegetables if you please and serve.


Bakerella

Grilled Cheese Sandwich

When I first made grilled cheese sandwich - I made it for my boyfriend and brother. Every now and then they ask me to make another one of those yummy grilled cheese sandwiches. This, I am flattered of, and hence I feel no harm in sharing this recipe with you.

Ingredients
Butter
1 or 2 slices of sheese (preferably tasty sliced cheese)
2 pieces of bread

Method
1. Butter both pieces of bread on one side generously.
2. Sandwich the cheese between the two slices of bread, with the buttered sides on the outside.
3. Fry both sides of the sandwich on medium heat until golden.
4. Enjoy :)

Note
You may use any cheese, really, however I find that shredded cheese is much harder to deal with as it takes longer to melt. This makes it harder to flip the sandwich when the sandwich has started to brown. What I would suggest is, when using shredded cheese, fry on low-medium heat so the sandwich does not brown first. 


Dig in!


Bakerella

Grilled satay chicken skewers

There is always a time when it's hot, or when you have a few friends over where it would be easiest to just throw a barbecue. You have your steak, sausages, prawns, chicken wings and lamb chops. But rarely do people make chicken skewers. Why? Perhaps you don't have a good recipe? Don't have the time?

Well, I can help you out with the first question - as I have found a fool-proof recipe for satay chicken skewers.

The recipe I used:
Satay Chicken Skewers

So there was just one thing with the recipe that I was hesitant about. So many different ingredients, all using just minute portions. Most of the time, we don't want to buy an ingredient and use 1/100 of it - in which case there aren't many other dishes you cook requiring that ingredient. 

Well, to solve the problem for this recipe, what I substituted for the coriander powder, lemongrass, shallots, chilli powder and turmeric powder was Ayam Satay Seasoning powder. For each teaspoon or tablespoon of the above ingredients, I substituted 1:1 using the powder. 

Having trouble finding the kecap manis - Indonesian sweet soy sauce? They're sold at the majority of Asian supermarkets so you won't be out of luck finding that ingredient.

For this recipe, I did not add water. I only marinated the chicken for 30 minutes as it was an improvised dinner on the menu. The chicken tasted just as beautiful as I cut the chicken into about 1cm cubes (this also helped with the cooking process). Another thing, I added capsicums and onions to the skewers - so sort of like a satay chicken kebab, really (but oh so delicious).

The first few times I had used this recipe I made it for a barbecue, but most recently I rushed, so I pan-fried the skewers.

Now, in my opinion pan frying the skewers take a shorter amount of time to cook the chicken through. Tip: put a lid on your pan whilst frying as it will cook the chicken much faster! You do not need to add extra oil, as your recipe already calls for oil. 


Even though I pan fried it, it looks as if it was grilled! Yay :)

I haven't found a good recipe for the peanut sauce though, but stay tuned as I will keep looking for good peanut sauce recipes!


Bakerella

Raspberry Sorbet

The other day my mum bought frozen raspberries and asked me to make raspberry sorbet for her. I decided to use a recipe that came with my Cuisinart ice cream machine.

The recipe I used:
Raspberry sorbet recipe

As we all know, raspberries can be sweet or very sour, so test the mixture before you add any sugar. I used my ice cream maker to churn the mixture, then froze it for 1 hour before serving. The verdict? Yum yum!

However, as one batch was more than enough for myself and my mum, I had left the rest in the freezer overnight. When I returned in the morning, the mixture was frozen like an ice block.. damn. 

This was a good recipe where you can have the sorbet straight away. When you leave it overnight, just let it defrost a little before you serve. 


Bakerella

Friday, 11 January 2013

Mangoes and Cream Ice Cream

Yummy! Since it's been so hot lately, I decided to make full use of my ice cream maker. This is one of my favourite ice cream recipes because it tastes like Weis mango ice cream bar. This recipe also does not give you quantities such as "2 medium mangoes" etc. and that is one of the main things I like about it, as it gives you a more accurate quantity such as "1 1/3 cups of mango flesh". 

The recipe I used:

Now, I was unfortunate to be out of orange juice for the recipe - however breakfast juice did the trick. Once you have followed the recipe and made your mango ice cream mixture there are two pathways:
1. Put the mixture into an ice cream maker.
2. Put the mixture into the freezer overnight. Before you serve, let it ripen in the fridge for 20 minutes. 

For path 2., prior to receiving an awesome ice cream maker for Christmas (^_^), I would let it ripen for 20 minutes and then put it in the blender and blend until smooth. As with many ice cream recipes (without the use of an ice cream maker) you will find a top icy layer of ice cream. All you need to do is put it in your blender, whiz it up and you have smooth ice cream.

Enjoy this dessert with some cut up mangoes - delicious!

Bakerella 


Wednesday, 9 January 2013

Profiteroles

I haven't posted in a while, but I have been busy - cooking. This post is about profiteroles - something that I have tried and tested MANY times. It is an absolutely delectable French dessert. So profiteroles are made of a ball shaped baked choux pastry and pastry cream (you can choose to fill with ice cream too).

The recipes I used:

Let's start on the pastry cream as we need to let it cool after cooking it. I normally make this cream using a whisk to stir - this is an effective tool to help you break away any clumps in the cream. For this recipe, if you're not a big fan of butter you can omit it (I have done this a few times when making pastry cream and it still tastes great). If the end result still has clumps I would suggest using a blender to whiz the cream until smooth (food processor and electric mixer are alternatives). 

If the cream is too thick - don't fret! Just add a table spoon of milk until you achieve your desired consistency. :) The plastic wrap over the cream is essential, otherwise you get an icky top layer of cream.

The next part to making profiteroles is the choux pastry. This is a tricky pastry to make (as with all pastries in my opinion!) and it needs quite a bit of attention. As a recommendation, if you read the recipe carefully before you start (this should be done for all recipes though!). 

Now, for all baking I use baking paper to line the trays - ever since I invested in baking paper I have never turned back. Don't worry if your profiteroles don't puff or puff then deflate because it is hard getting the consistency of the choux pastry correct. The consistency for each batch really depends on the size of the eggs so don't rush, take it slow - add the eggs bit by bit.

This was what my choux pastry looked like.. I don't bother to make them into perfect shapes because they all puff and end up looking the same :D


After 25 minutes...


After piercing each profiterole with a skewer, I put the tray back in the oven and left it ajar. This is a crucial step as it releases steam from the profiteroles - it minimises sogging after.


After I piped in the chilled pastry cream to my profiteroles (I used a piping syringe. Alternatively you may cut the profiteroles in half horizontally and spoon the cream into them.), I melted some dark chocolate using the double boiler method. The profiteroles were dipped into the melted chocolate and left on a plate to set. 


Scrumptious!

Bakerella